By Thursday I'd made two prototypes. Not two polished versions, two iterations of figuring out what the thing actually is. I explored a hexagonal grip pattern and a trapezoidal profile as an alternative. The hexagonal one had something about it, the tactile quality, or maybe just that it felt less generic. Having both in hand made the comparison immediate.
The consultation on Friday was titled 'Refining' which was an accurate description of where Week 2 had landed. What I was showing: a breadboard setup with 3D printed hexagonal keys mounted in a frame, connected to piezo electric sensors in a grid arrangement, running into p5js on the laptop.
WEEK 2
20-23 January 2026
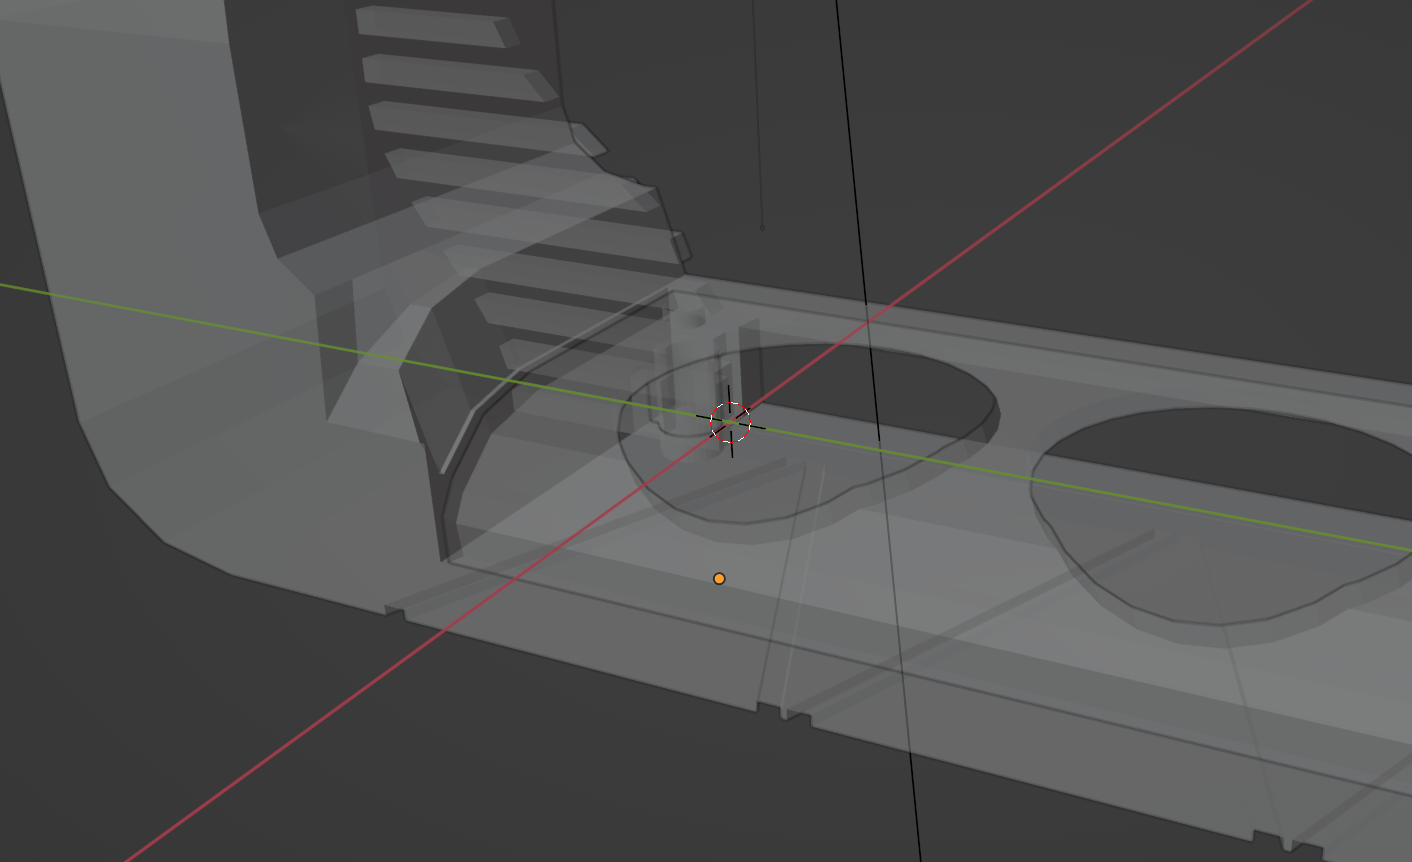
Grid Structure
Second form modelled in 3D before fabrication. Testing whether a fabric with the texture surface profile is more effective. Comparing both in hand resolved the question quickly.
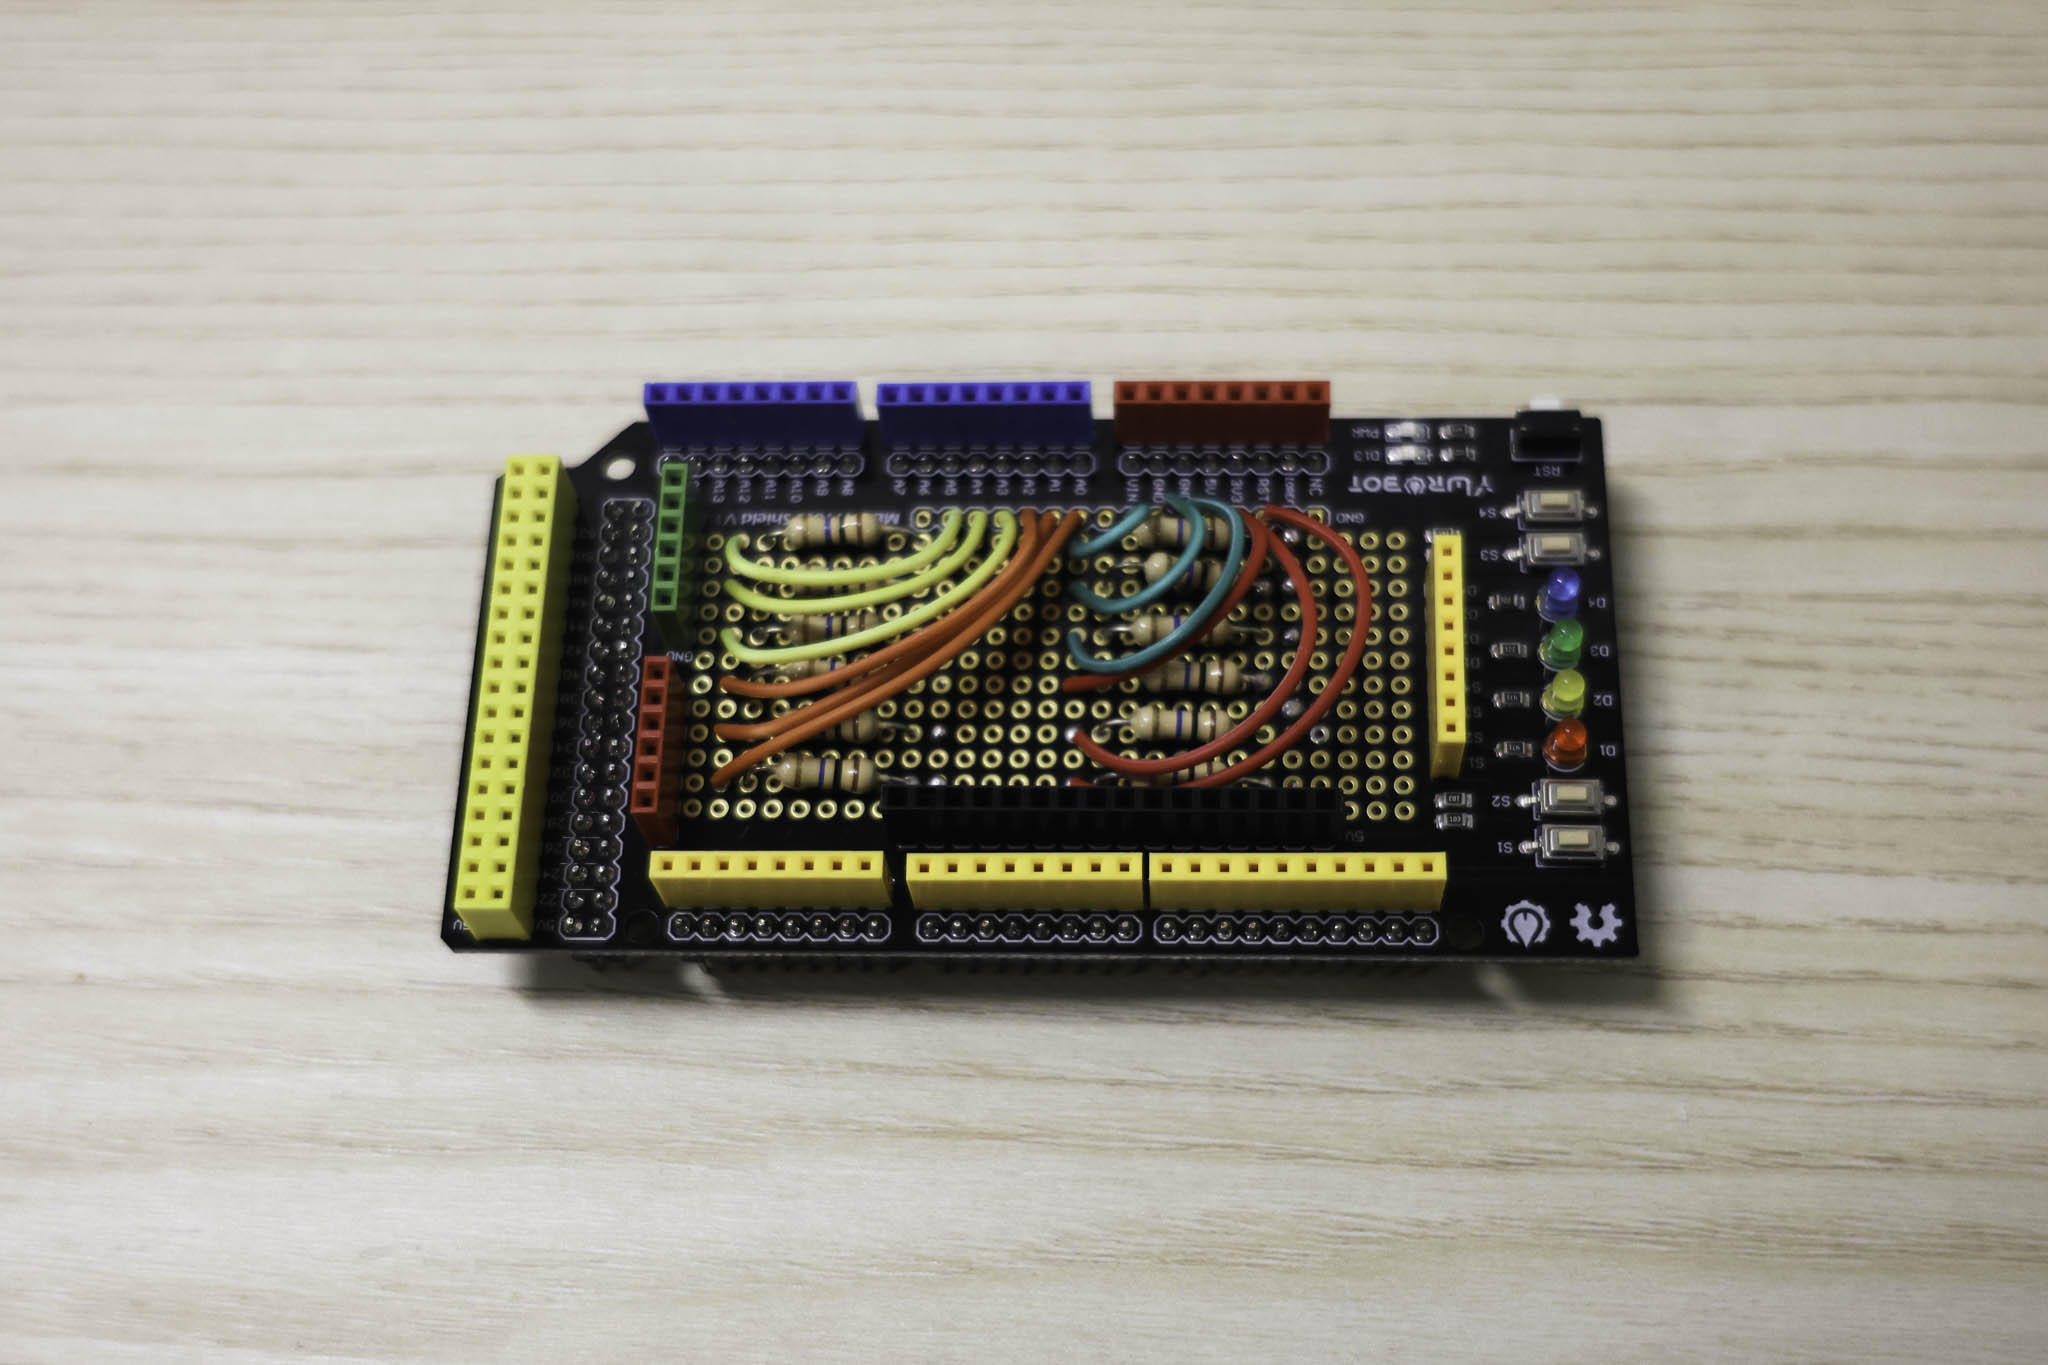
Arduino + Piezo Setup
This image is the Arduino Mega Shield with the wiring connected to the 10M Ohm Resistors
I started by thinking about what performers are already familiar with physically, what kinds of haptic interaction feel natural in a performance context. From there I settled on two directions: one prototype focused on texture, the other on portability. Rather than overthinking the concept before making anything, I wanted to get something physical out and see how it actually felt in use.
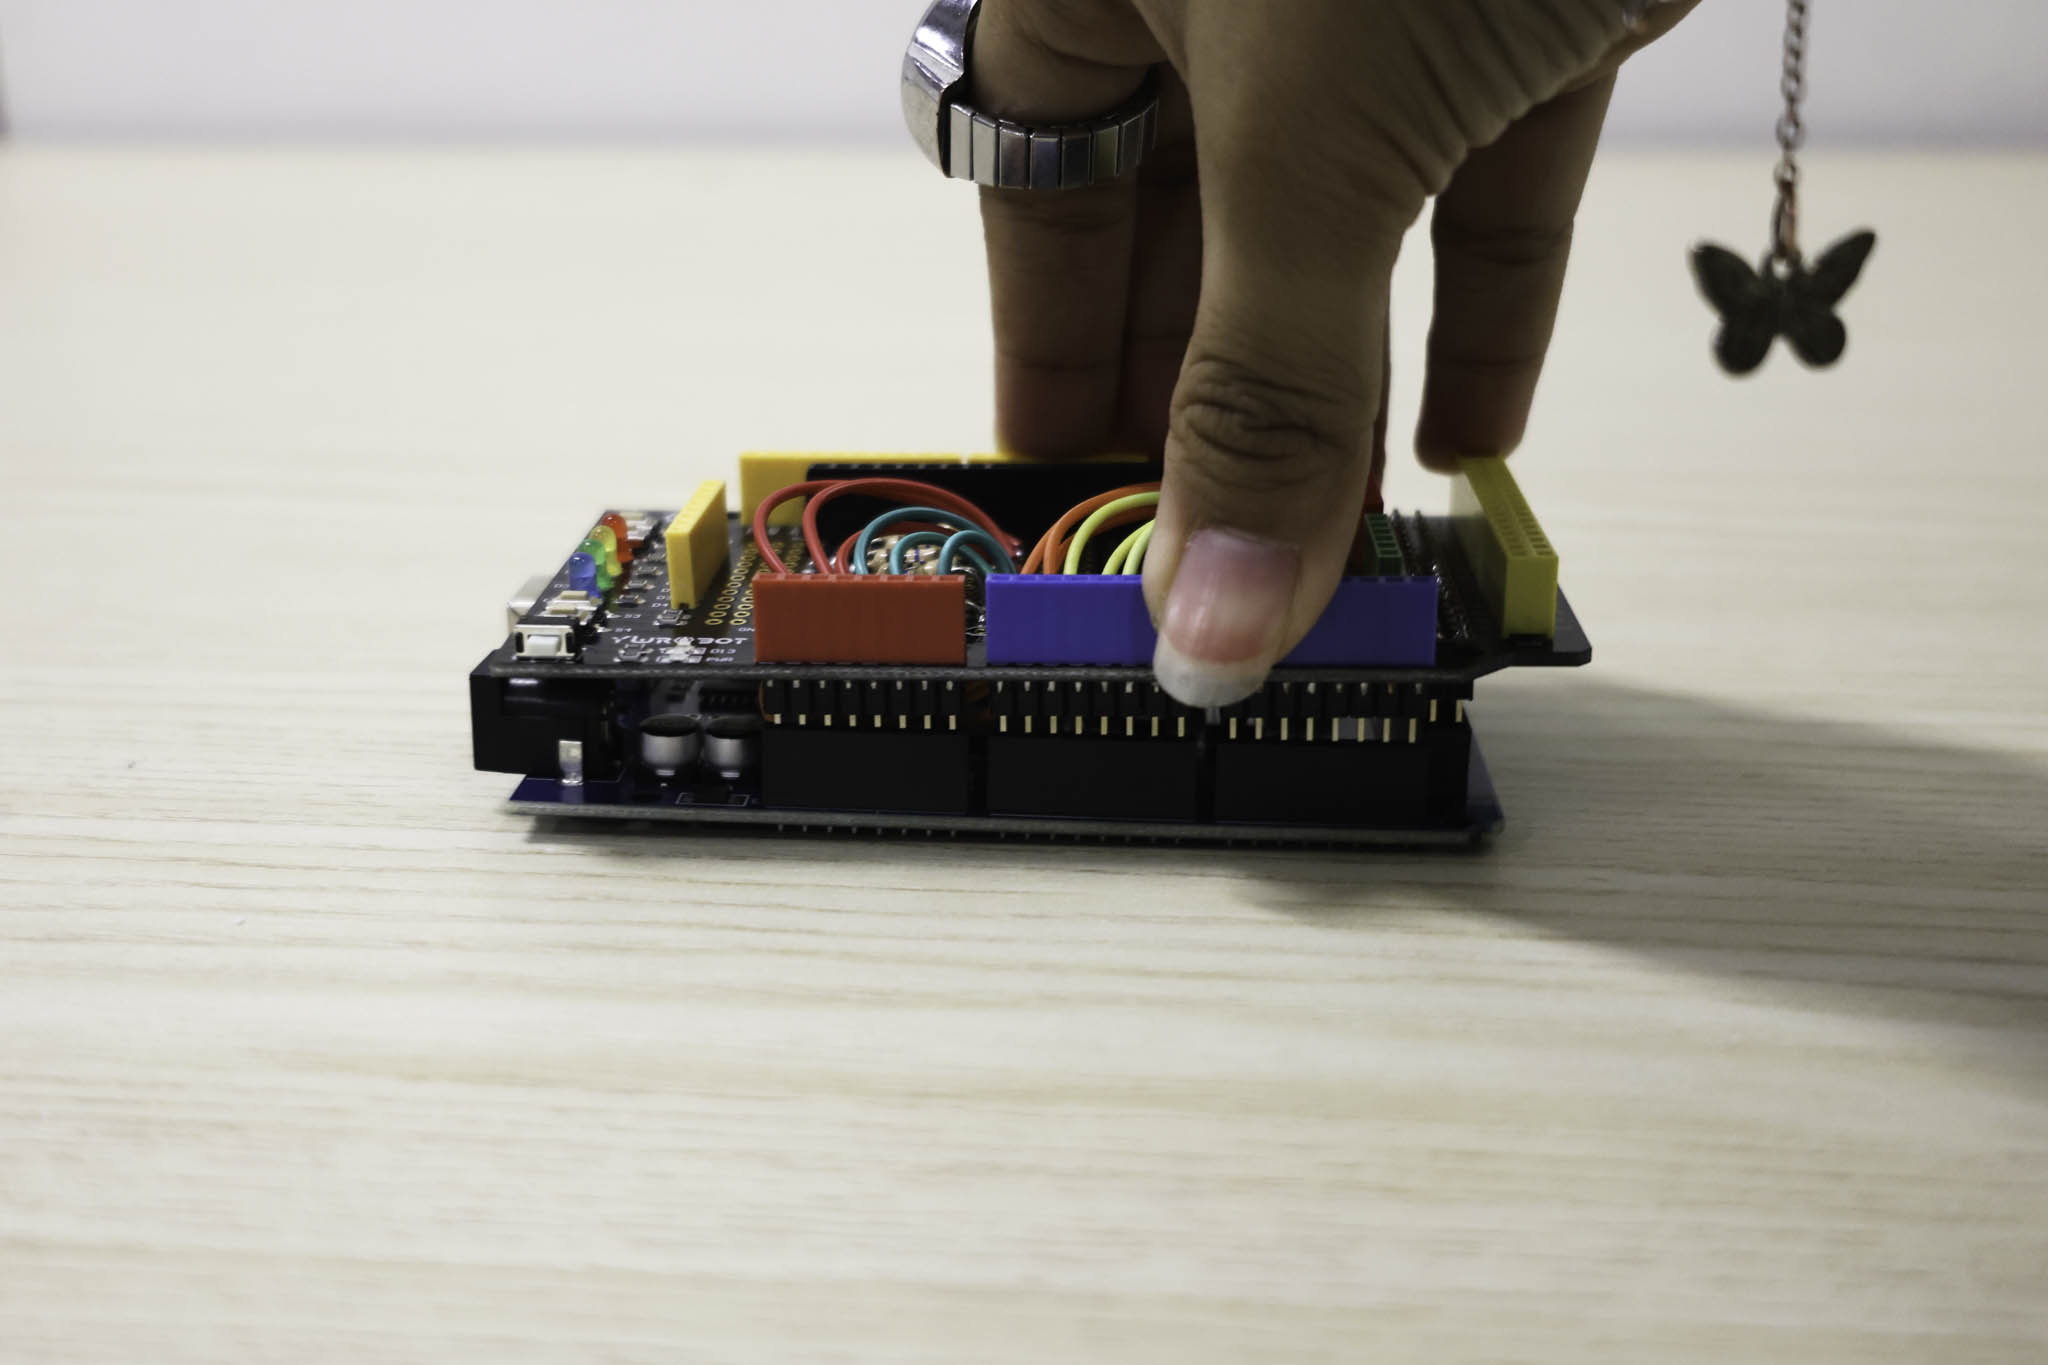
Over the weekend I started modelling the base forms and working out the wiring logic at the same time, especially for Prototype 2. Prototype 2 was about exploring area-based interaction, on an actual instrument you're not just engaging one fixed point, different zones mean different things. I wanted that spatial quality, and texture as the main differentiator between keys. It's a stacked structure: the main wiring sits at the bottom, the sensor and key layer on top. More compact than the first bar layout, with some room for customisation in how the grid is arranged.
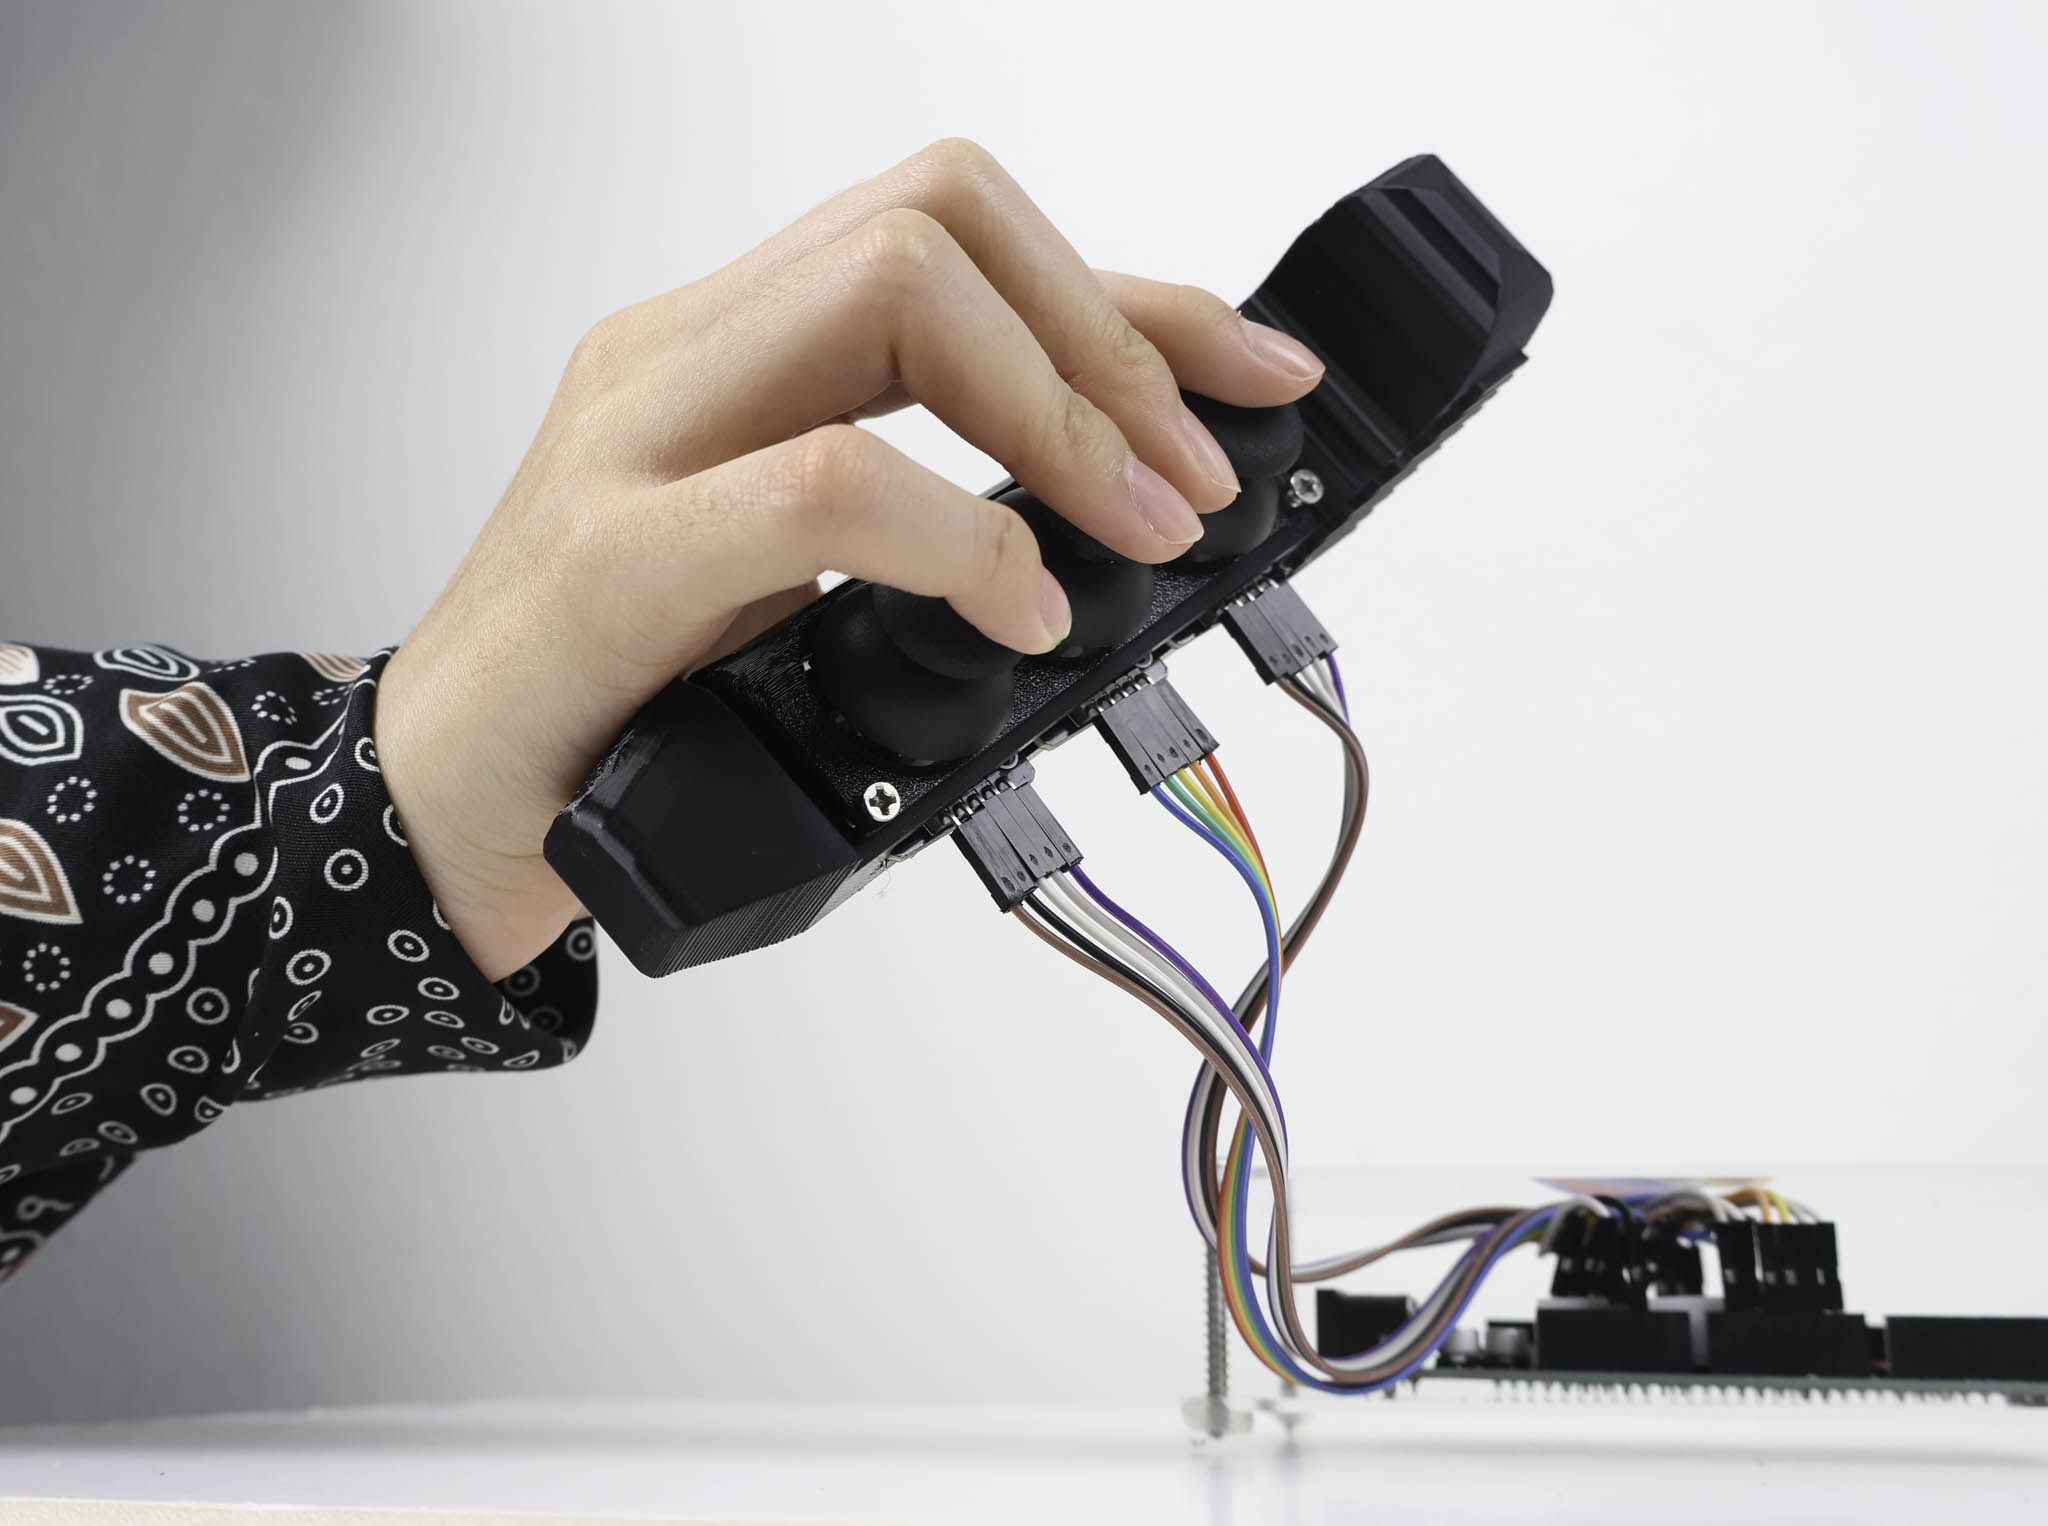
Prototype 3 moved in a completely different direction: portability. Most of what I'd built required a surface to rest on, which limits where a performer can use it. I wanted to explore a more free-form controller, one the performer could move with rather than being anchored to. The answer was joysticks for more dynamic control. What this meant practically was that the measurements had to be more precise than the piezo prototypes, since the joystick mechanism has more parts to account for in the casing. I just barely got the dimensions to work, and the assembly was still quite flimsy at that stage, I hadn't glued anything to the 3D print yet because I wanted to confirm it functioned before committing.
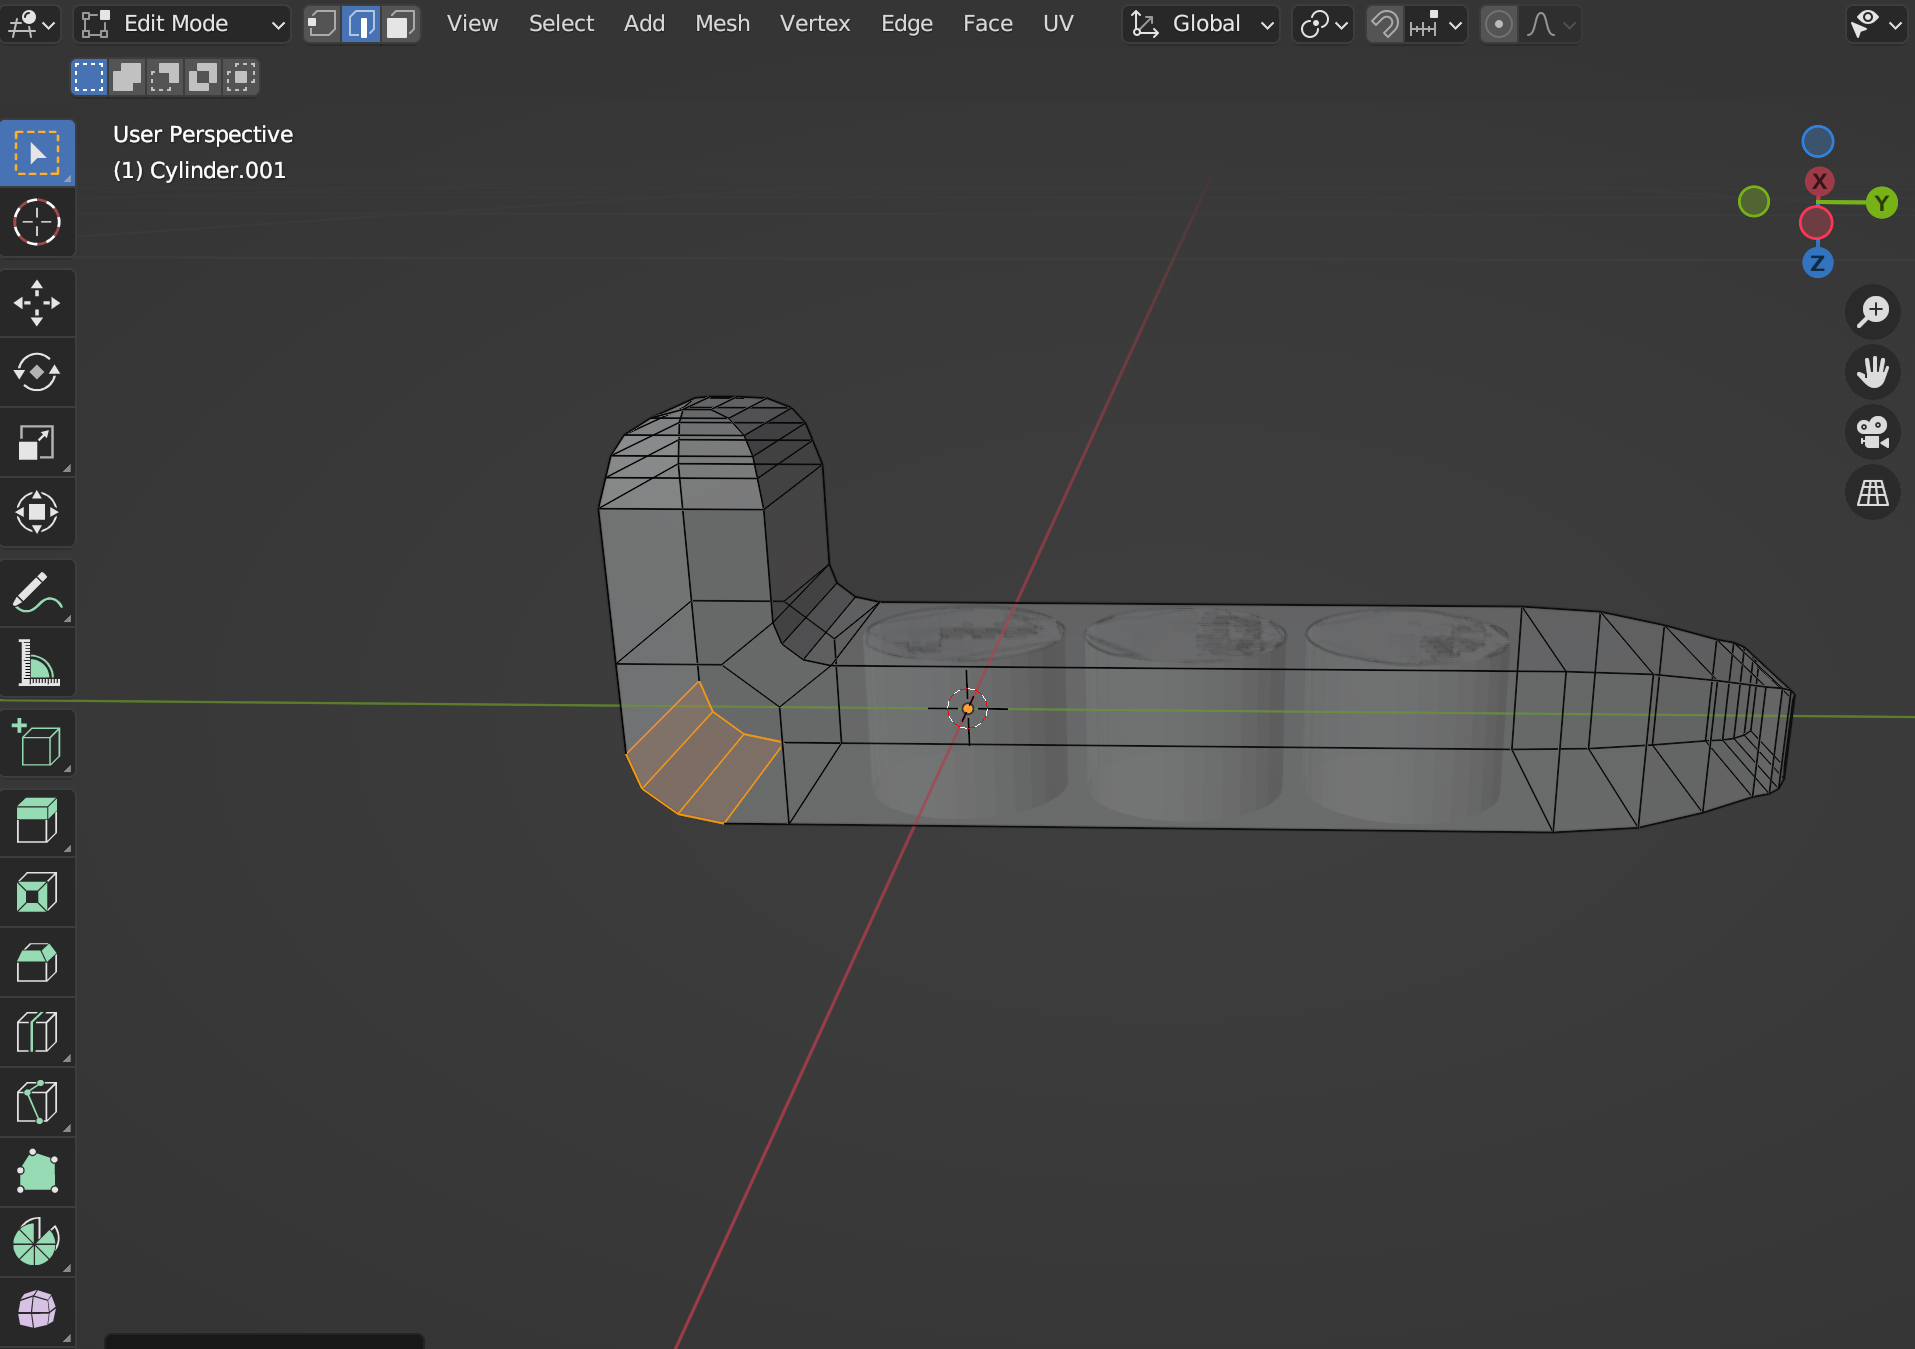
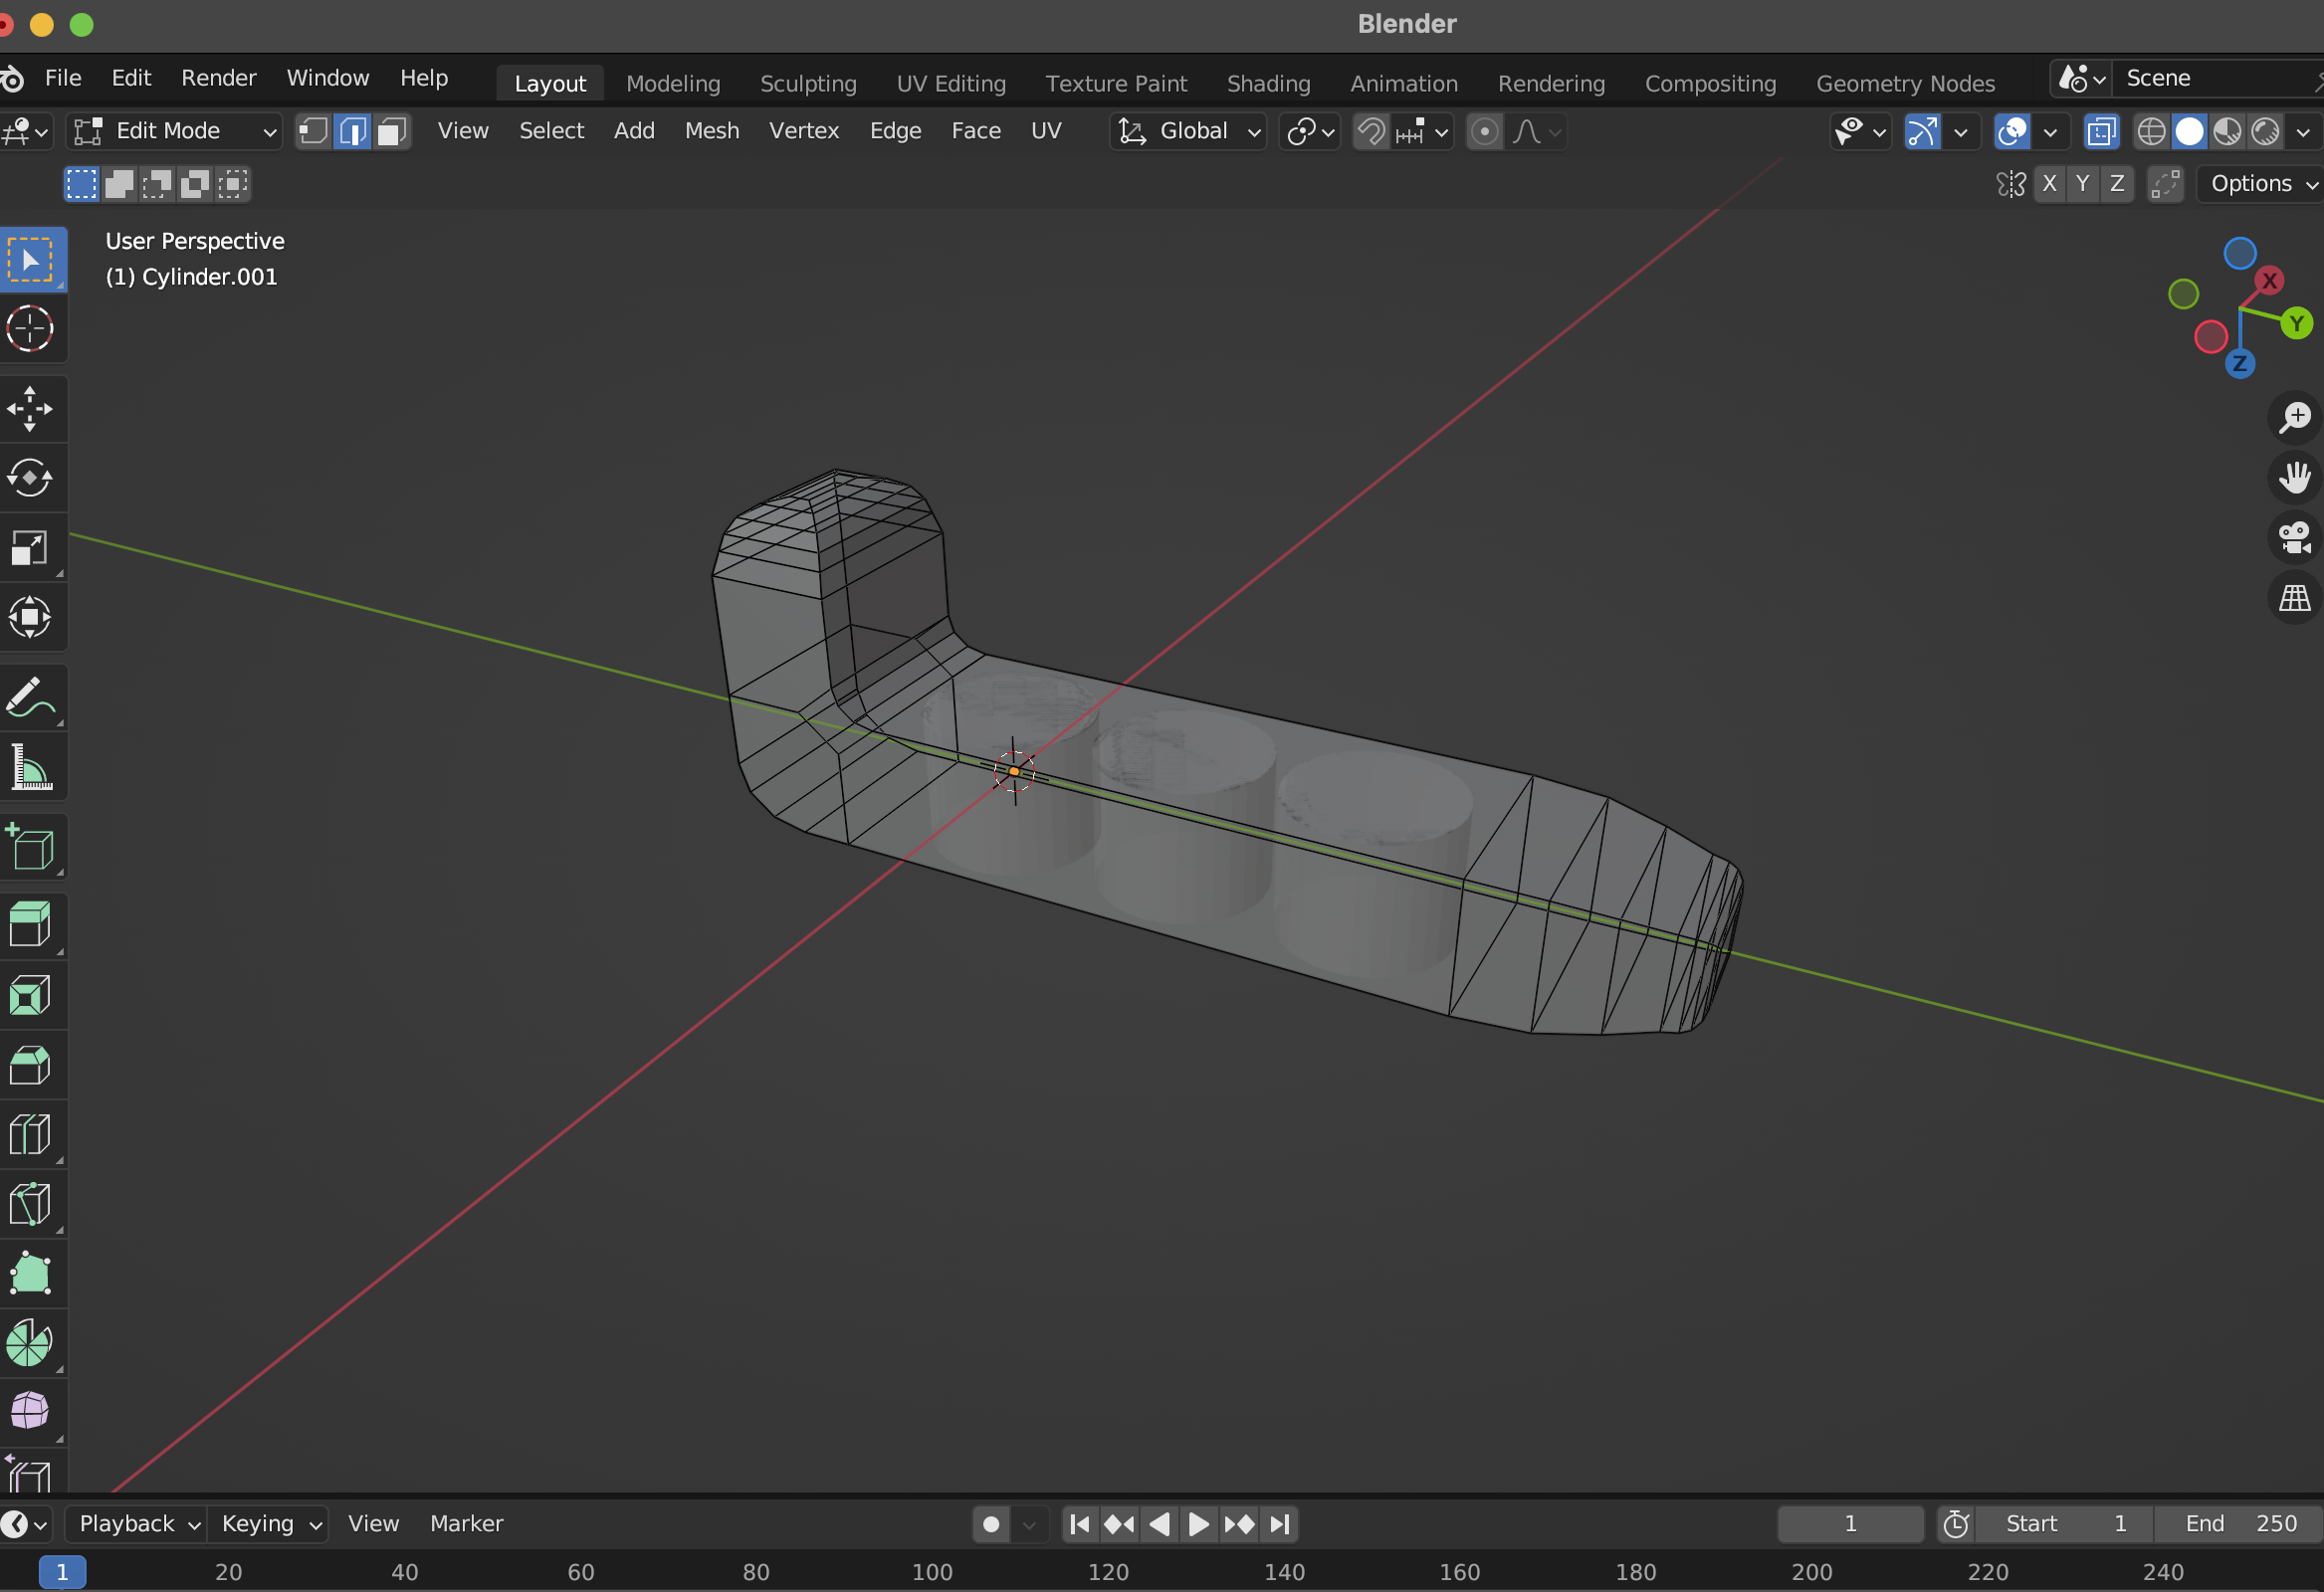
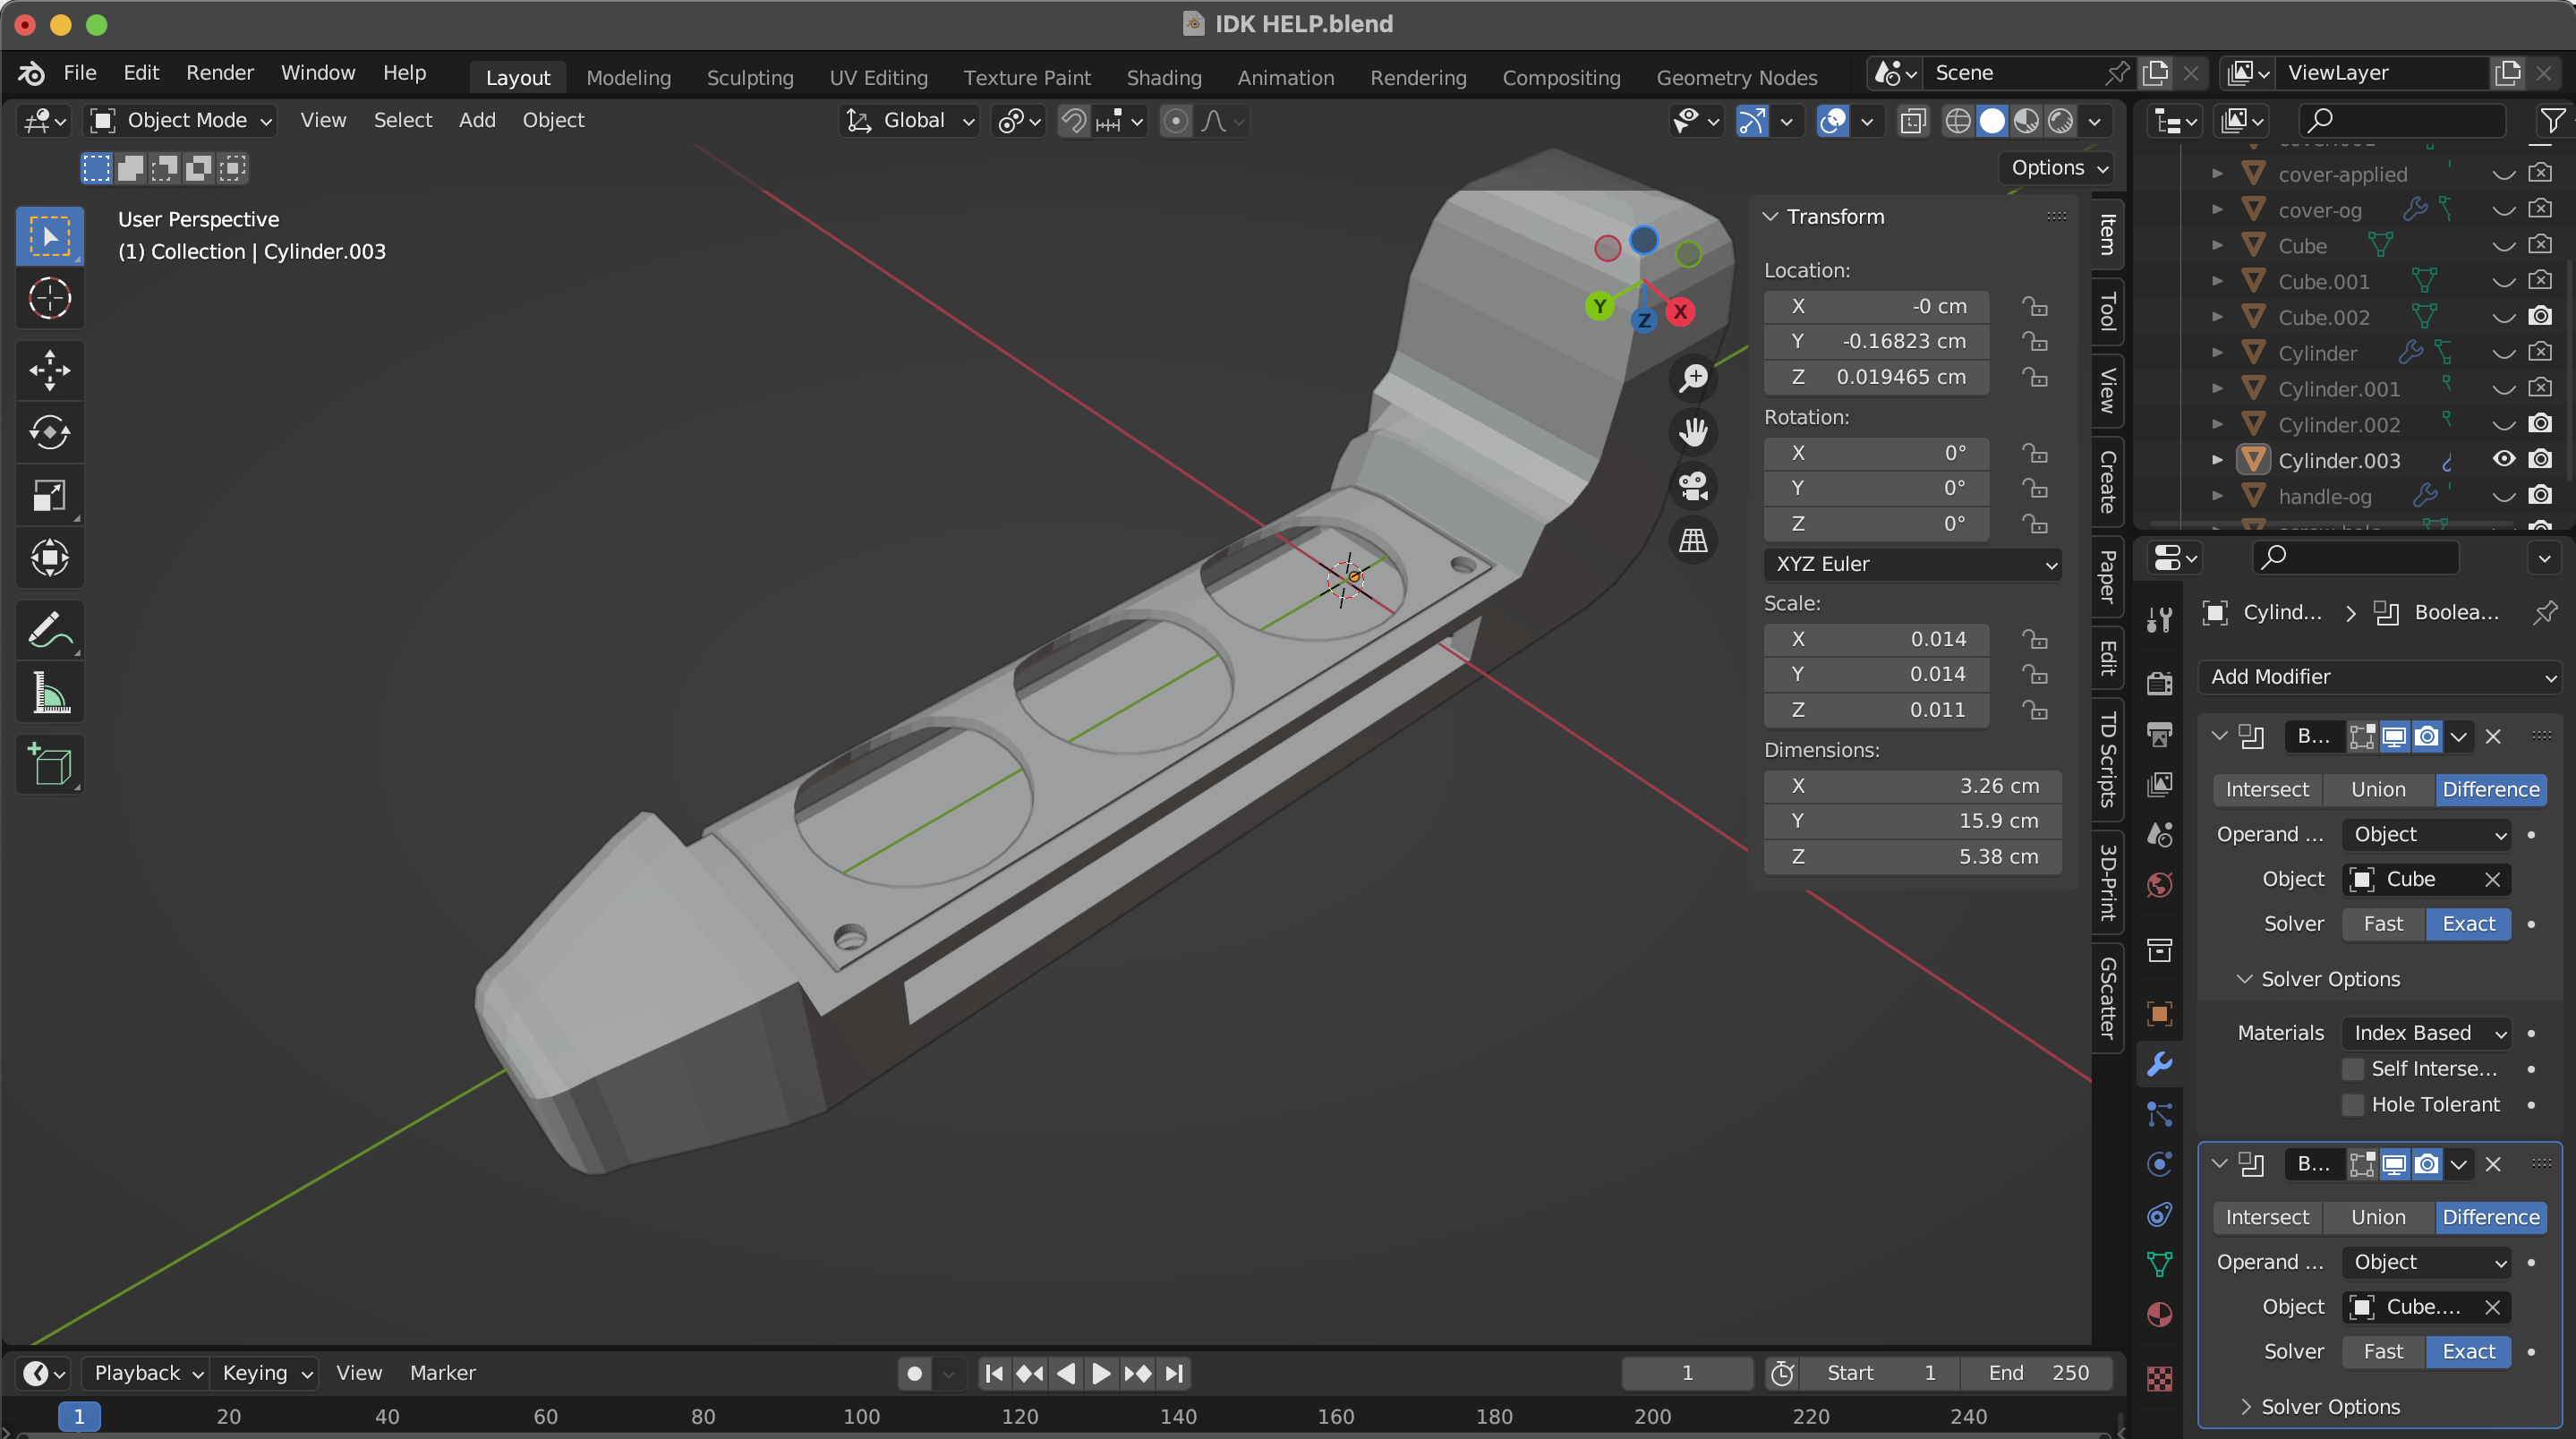
Before fabricating the second form I modelled it in 3D first. Going through the modelling process forces decisions about proportions and grip zones that are easy to skip when you're just 3D printing and testing. The form went through a few variations before I settled on the one worth making.
Friday was the grad project consultation with Andreas, Ethel was also in the session. The electronics: Arduino UNO connected to piezo electric sensors via analog pins and resistors. The schematic was in place, and I had an exploded diagram working through the layers: fabric on top, sensor underneath, circuit below that. The breadboard setup was functioning. Next phase is moving this onto a proper PCB.
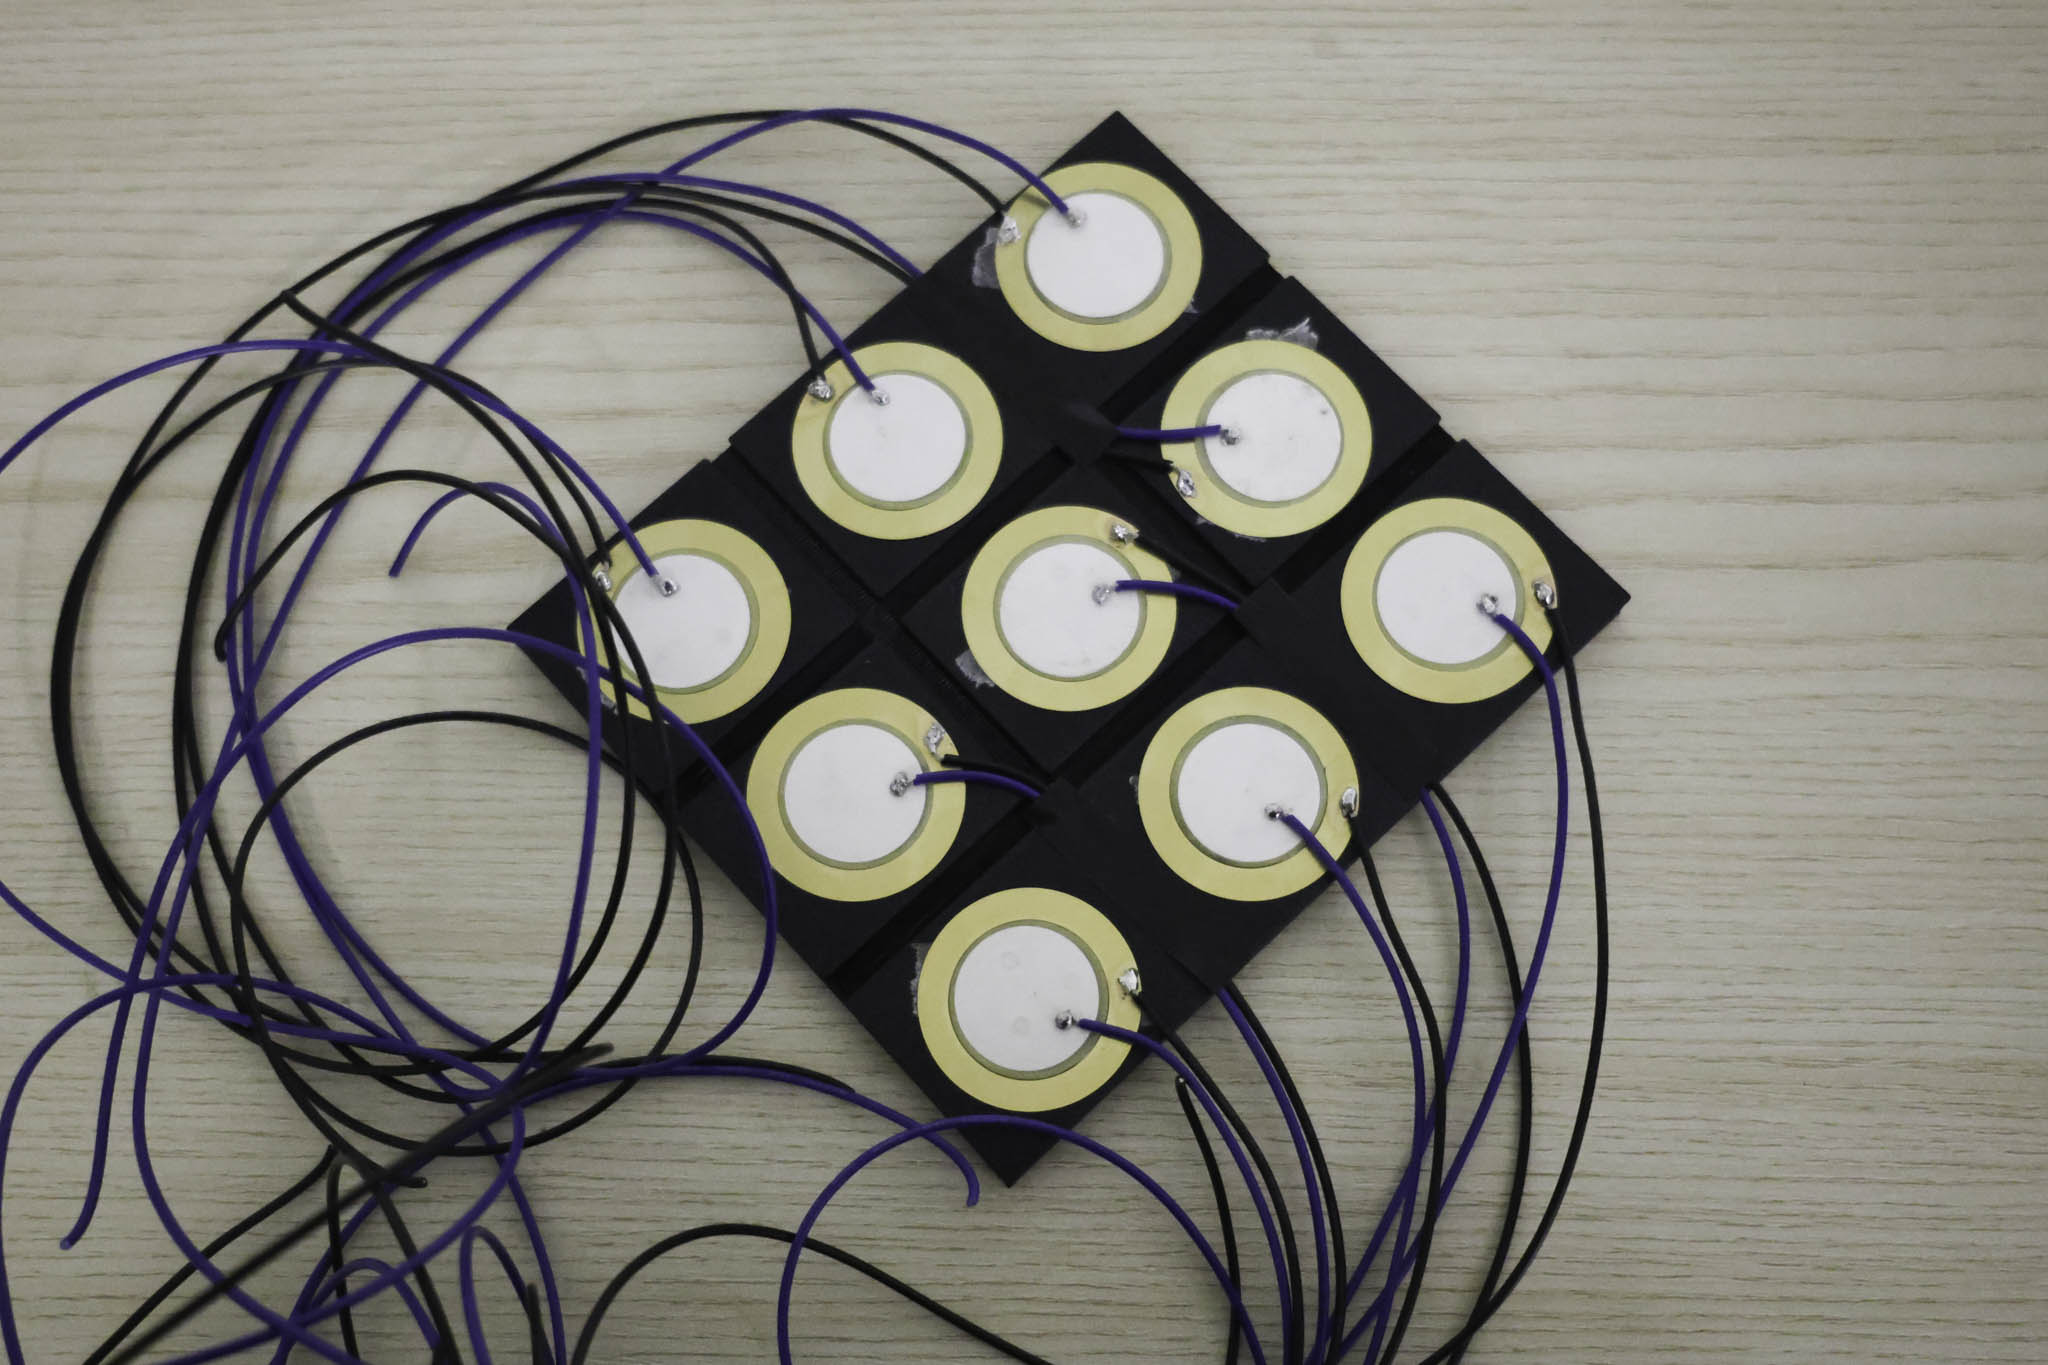
For this prototype I had the piezo sensors sit on top of the 3d printed grid where the resistors were underneath. The sensors are pressure sensitive, so they can be activated by pressing down on the keys, but they also pick up vibrations, which is why I had them sit on top. This way they can pick up the vibrations from the keys being tapped, which is important for the kind of interaction I'm aiming for.
I then tested the sensor to the visual using the p5js sketch I had from Prototype 1. For the time being I had the sensors controlling horizontal bands with one zone highlighted on activation. This was just to prove the connection between the sensor input and the visual output, but eventually each zone will control a different area of the visual output, allowing for more complex interactions.
Hardware Architecture - Wiring Schematic
Schematic drawn in Adobe Illustrator mapping the connections between the piezo electrics, the 10MΩ resistors, and the Arduino Mega Shield.
For the overall wiring of Prototype 2 I drew a schematic in Illustrator before soldering, building off the circuit logic from the first prototype. At this point I also ran into a hardware constraint: a 3×3 area grid means 9 piezo sensors, which requires 9 analog inputs. The Arduino UNO only has 6, so I had to move up to the Arduino Mega.
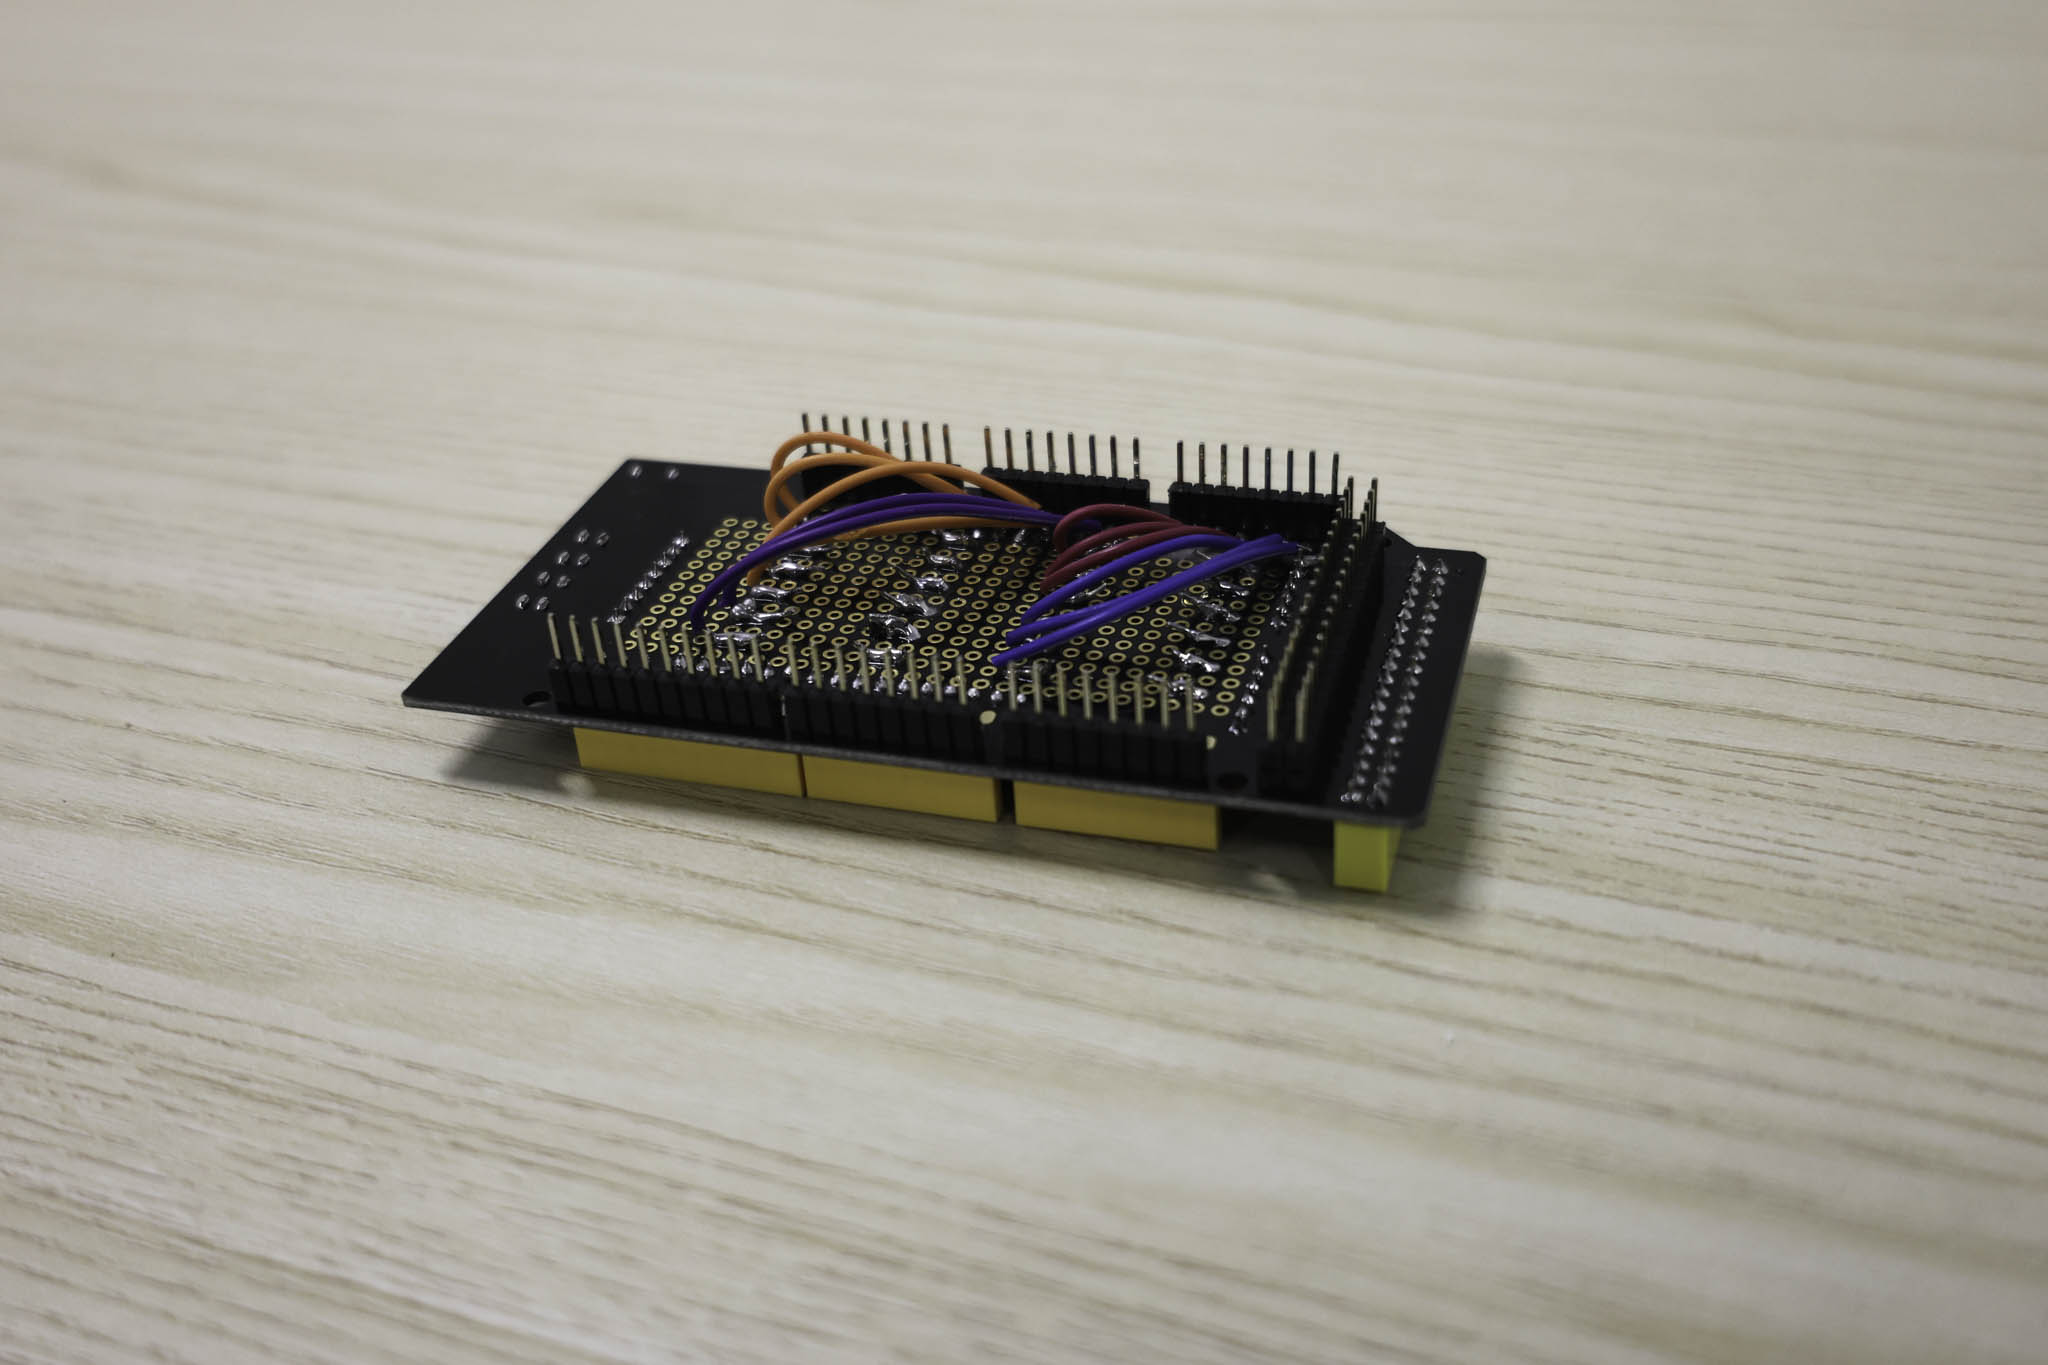
I went to Kuriosity at Sim Lim Tower and asked about a more compact way to assemble it. They suggested using a shield, which was something I'd completely forgotten about, but it turned out to be exactly right. I bought the Arduino Mega Shield and started soldering. It was more tedious than expected: you have to plan every solder point carefully around the header pins and other components to avoid bridging anything. I ended up soldering both the top and bottom of the shield to keep the cable routing as clean as possible so nothing would burn or melt.
After looking into the SUS questionnaire, I understood that it was a standardised usability evaluation tool designed to give a quick but reliable snapshot of how usable a system feels. Because my project is a physical interface, it matched well with how I wanted to determine the success of the prototypes, a structured way to measure whether performers found the controller intuitive and transparent in use. Alongside the SUS questions, I also added an open-ended question so participants could describe their experience in their own words, which felt important for understanding how to further refine the prototypes beyond just a score.